Many people regard the use of a fisheye lens as a gimmick. They find the extreme distortion generated by such lenses as an exaggerated manipulation that does not serve the image in a good way.
I tend to agree! Many times the fisheye effect is unpleasant to the viewer and seems to draw too much attention from the object or the story in the image.
However, the fisheye lens carries some qualities that, if used correctly and carefully, can serve, support and even add a lot to the image.
Here are some examples of how I use my 8mm Fisheye in my architecture photography:
Get both wide angle and detailed subject
Last year I was shooting at the Überseequartier U Bahn station in Hamburg, Germany. Going down the staircase I felt as if I am diving in a huge aquarium. I wanted to convey this feeling in my picture. I took out my 10-24 and took a shot from as far back as I could- to get as much of these aqua walls in my frame.

The image looked flat and I was missing a lot of the interesting details and textures of the platforms on the lower floor. Instantly I stepped forward and took another shot:

Now I got the lower platform right but lost all the aquarium around it….
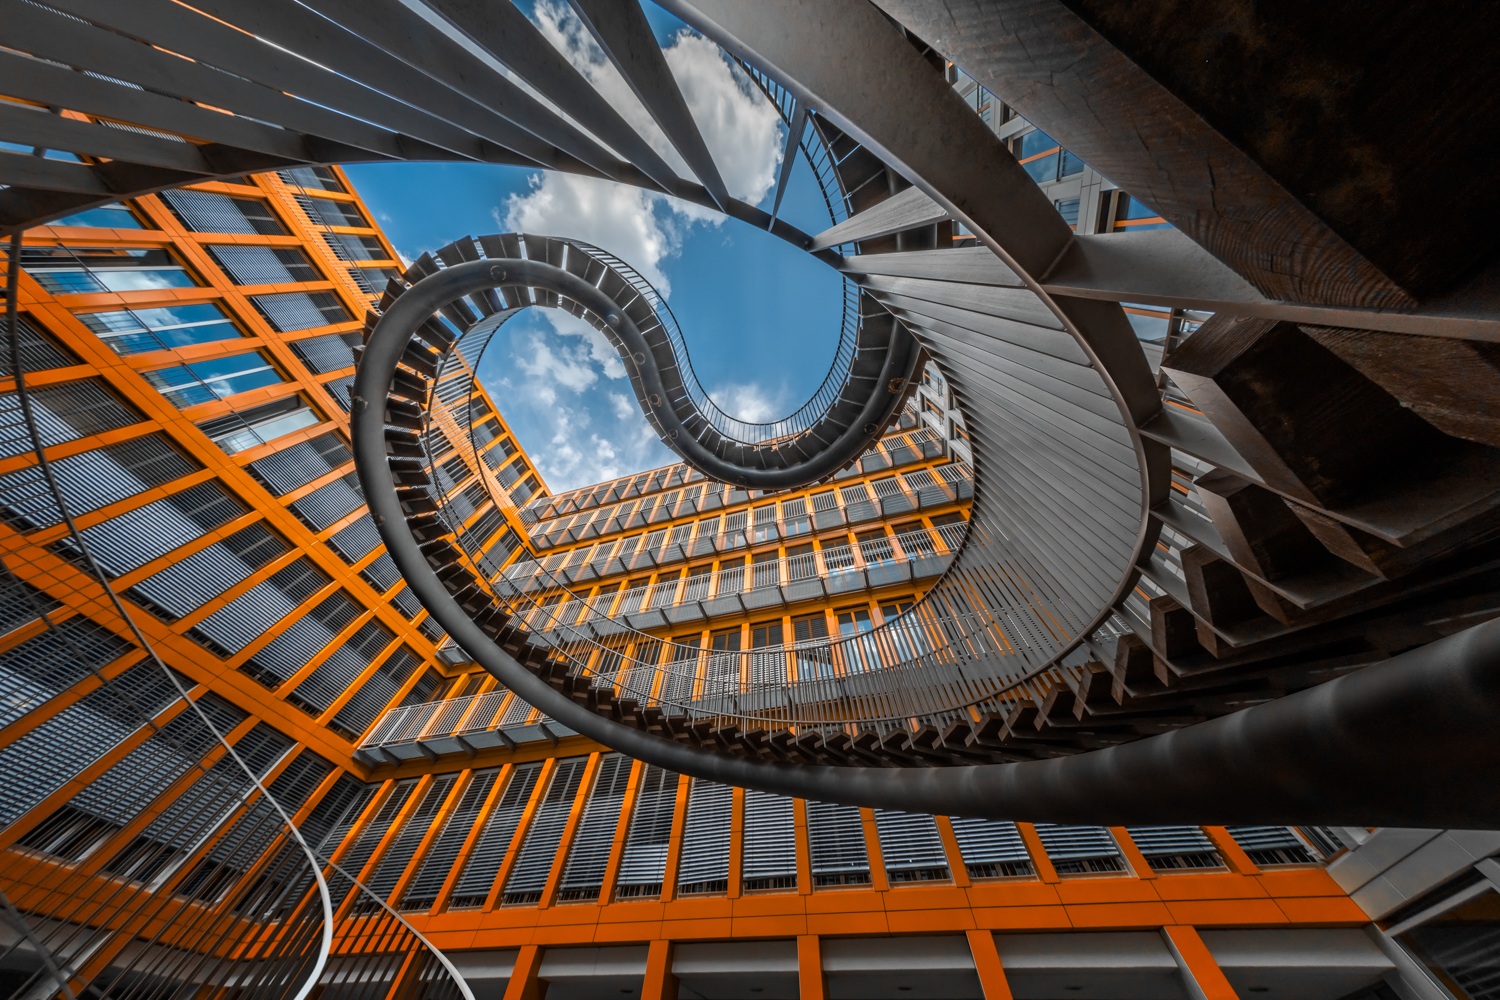
I switched to the fisheye lens and I was able to get almost all the aquarium back in without losing the platforms. As a bonus I got the escalators framing the center of the picture in a very unique way:

Distort the smart way
If you take a good look at the examples above you’ll see that there is not much of a distortion on the lower platforms of the station. In fact, if you compare the fisheye shot to the 10mm one above it- you’ll see that the central section of the frame is almost the same.
This is an important part in understanding HOW the fisheye distorts and HOW you can use it to work for you while composing your frames.
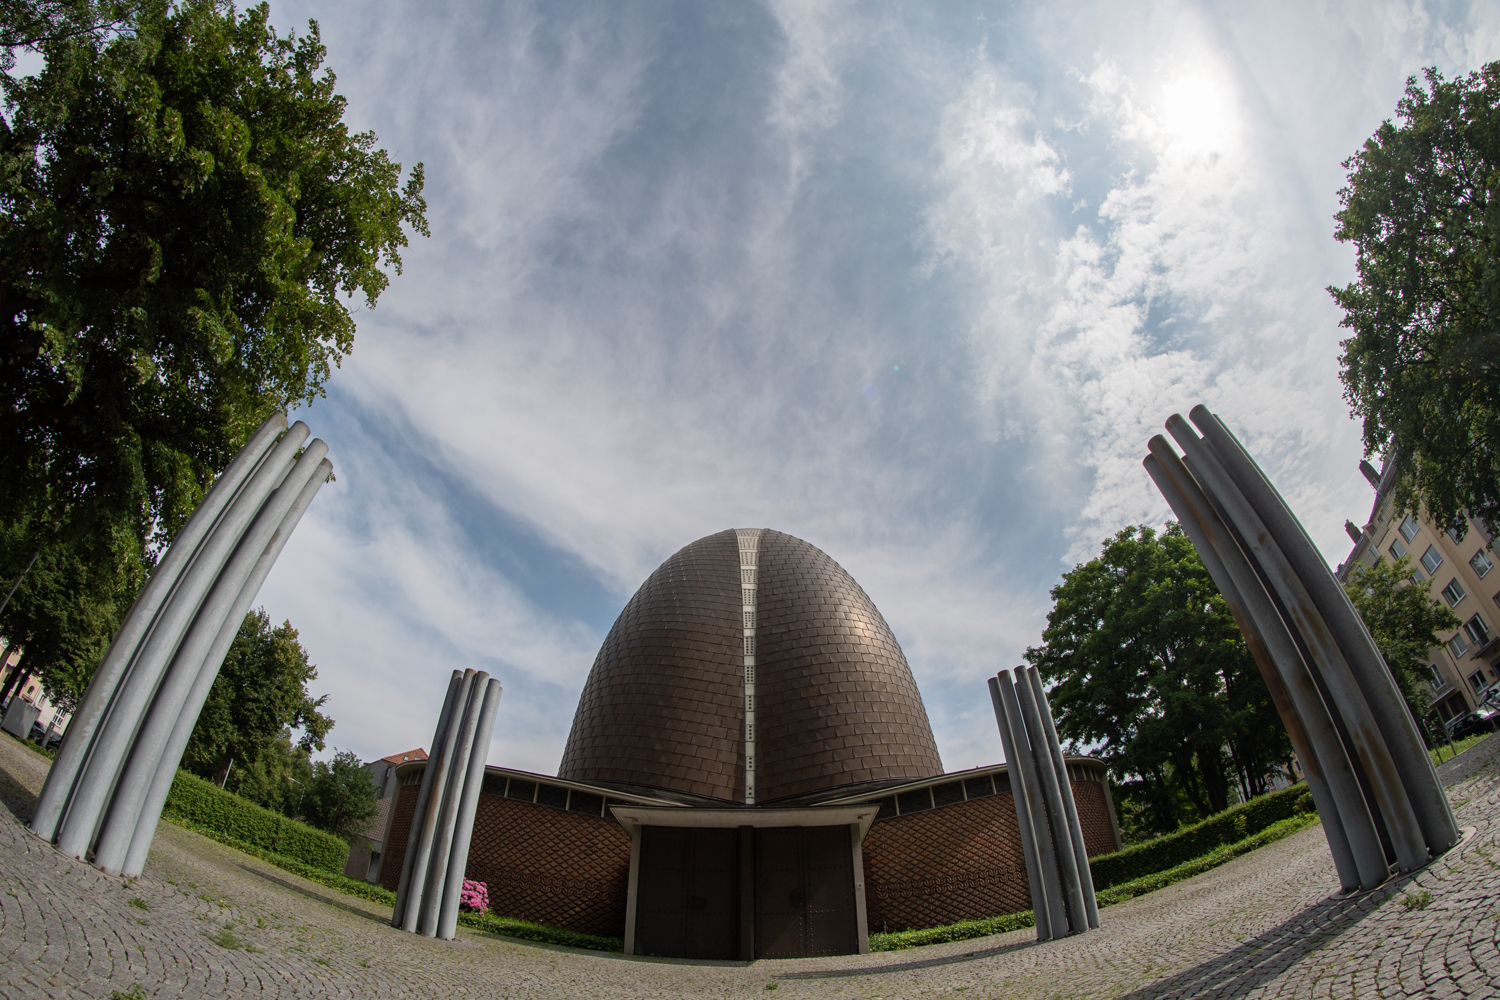
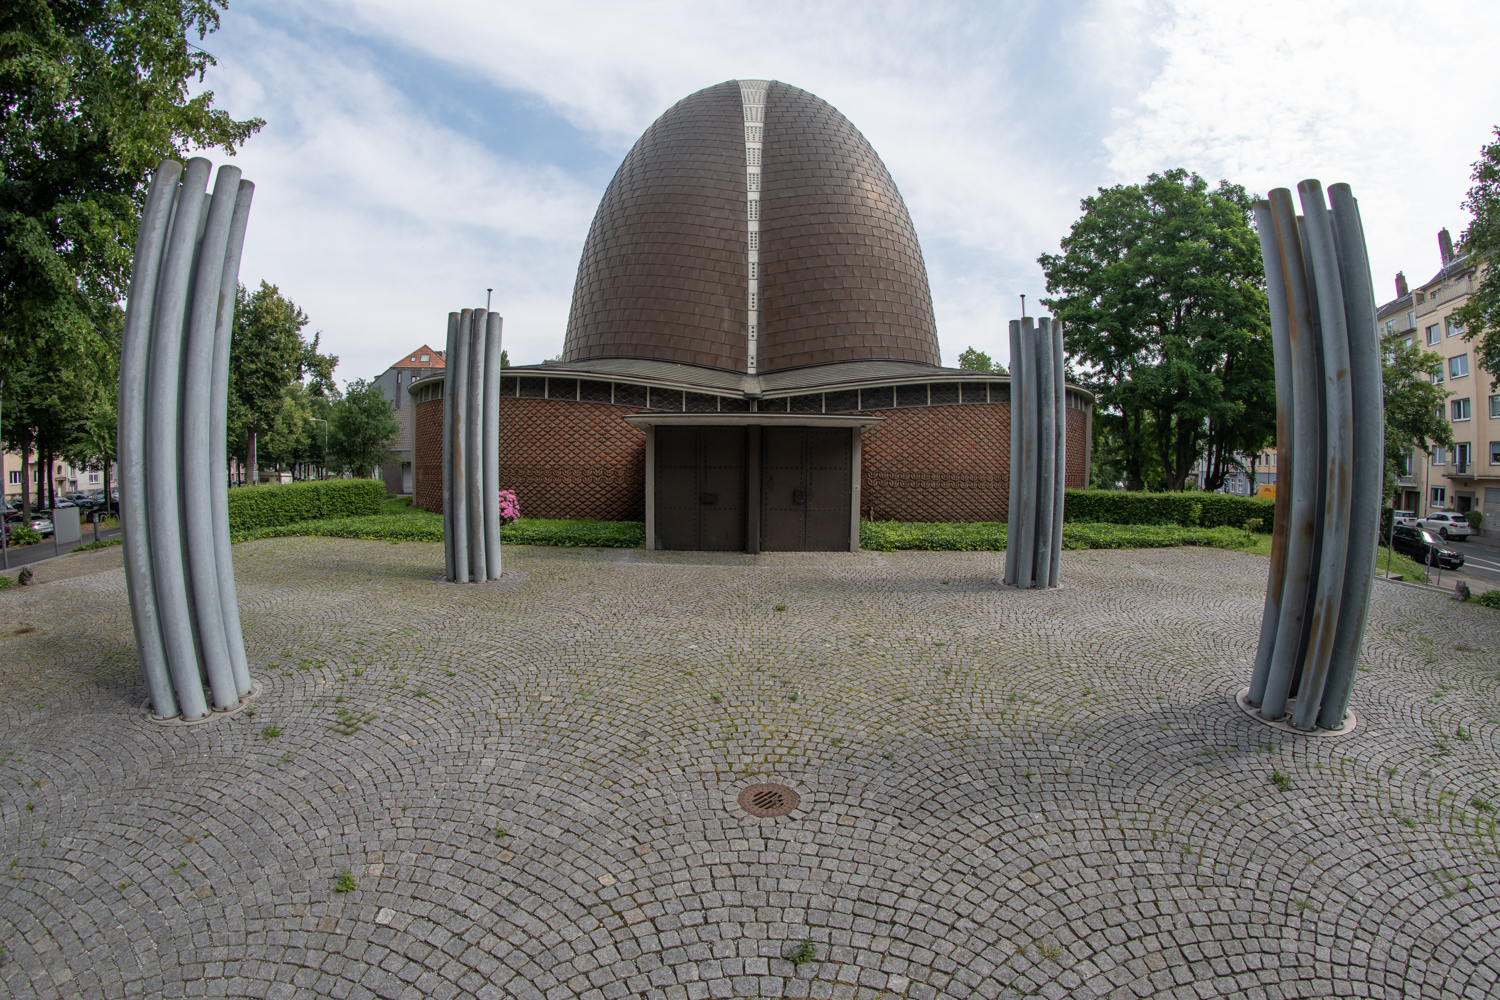
Generally there are two main rules to keep in mind. To illustrate them- take a look at the three pictures below (taken at the extraordinary Rochus Kirche church in Dusseldorf, Germany).
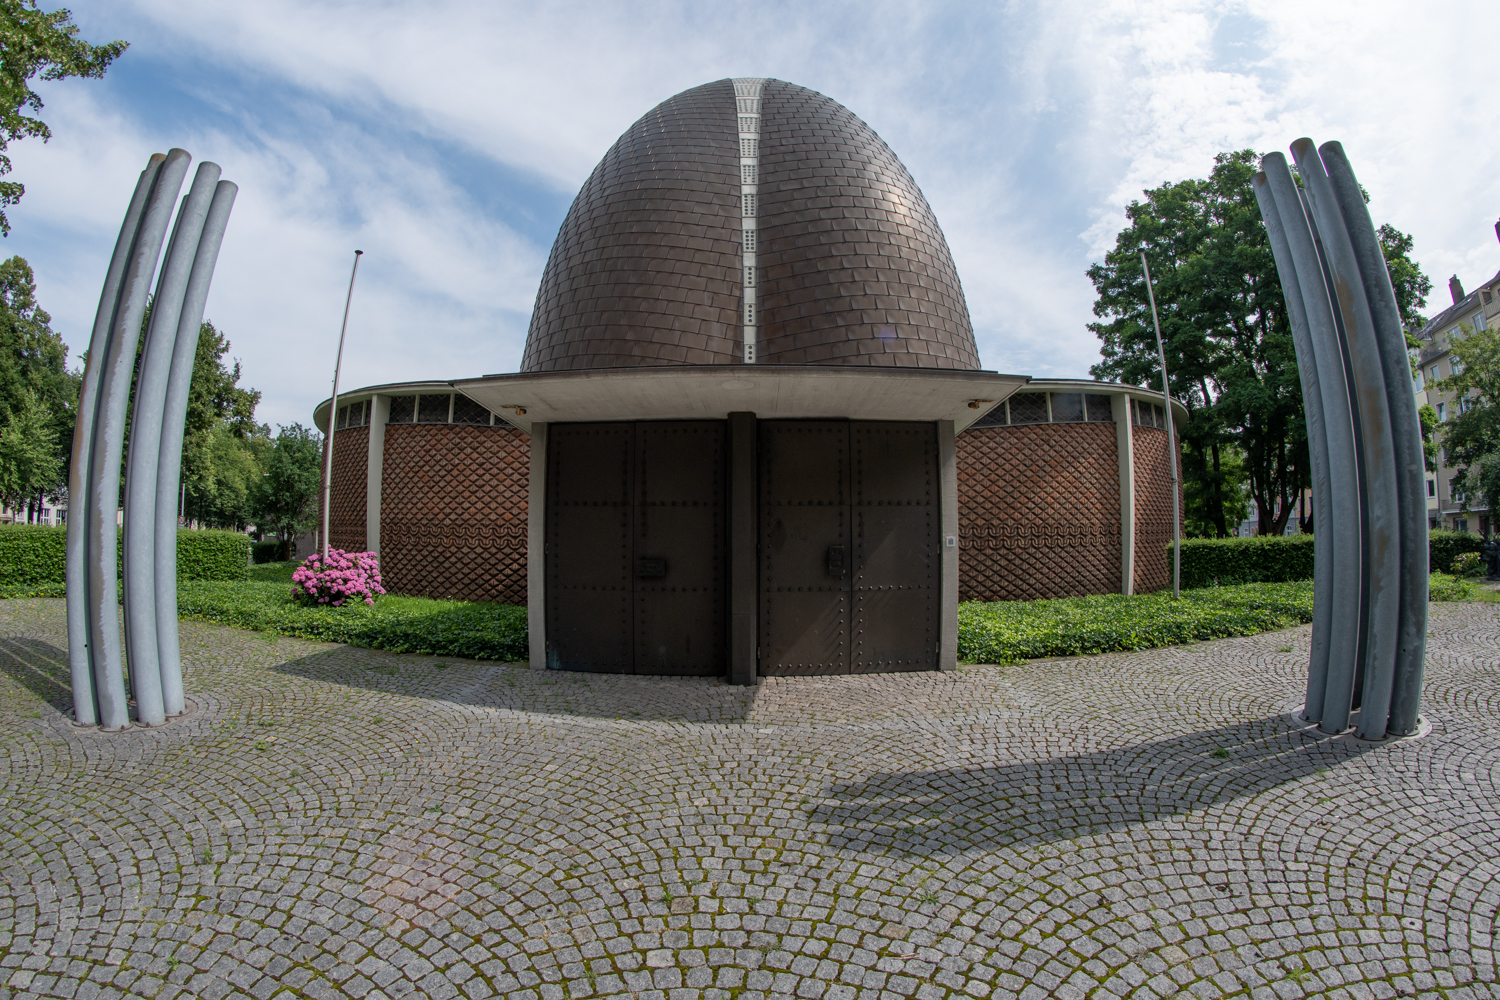
Rule #1: Objects located in the center of the frame will distort more as they are closer. Just like the nose of someone trying to look through a peephole :)
In the picture on the left- you can clearly see the front doors of the church are way too big compared to the church itself- this distortion is inconvenient to the viewer and should mostly be avoided.
Rule #2: Both vertical and horizontal distortions take place around the center. However, the center is straight. In the picture on the middle you can clearly see that because the horizon line is located at the bottom of the frame it is bowed upwards. While in the picture on the right you can see that because the church is centered, both the horizon and the central lines of the roof and doors are completely straight.
Keeping these rules in mind- and using them to distort the surrounding of the object and not the object itself can yield some very interesting outcomes. Notice how the pillars in the right picture frame the church and use as guiding lines to the object. Notice how they bend more, the closer they are to the edges of the frame.
While considering how to use the surrounding to frame your object, keep in mind the extreme wide angle of the fisheye lens (mine “sees” 180 degrees) means you have a lot of surrounding to play with.
Below is the end result of my visit to the Rochus Kirche church. As you can see- the object is not distorted, the pillars lead the eye to the object and the frame is practically the doorway at the entrance to the tower in front of the church.

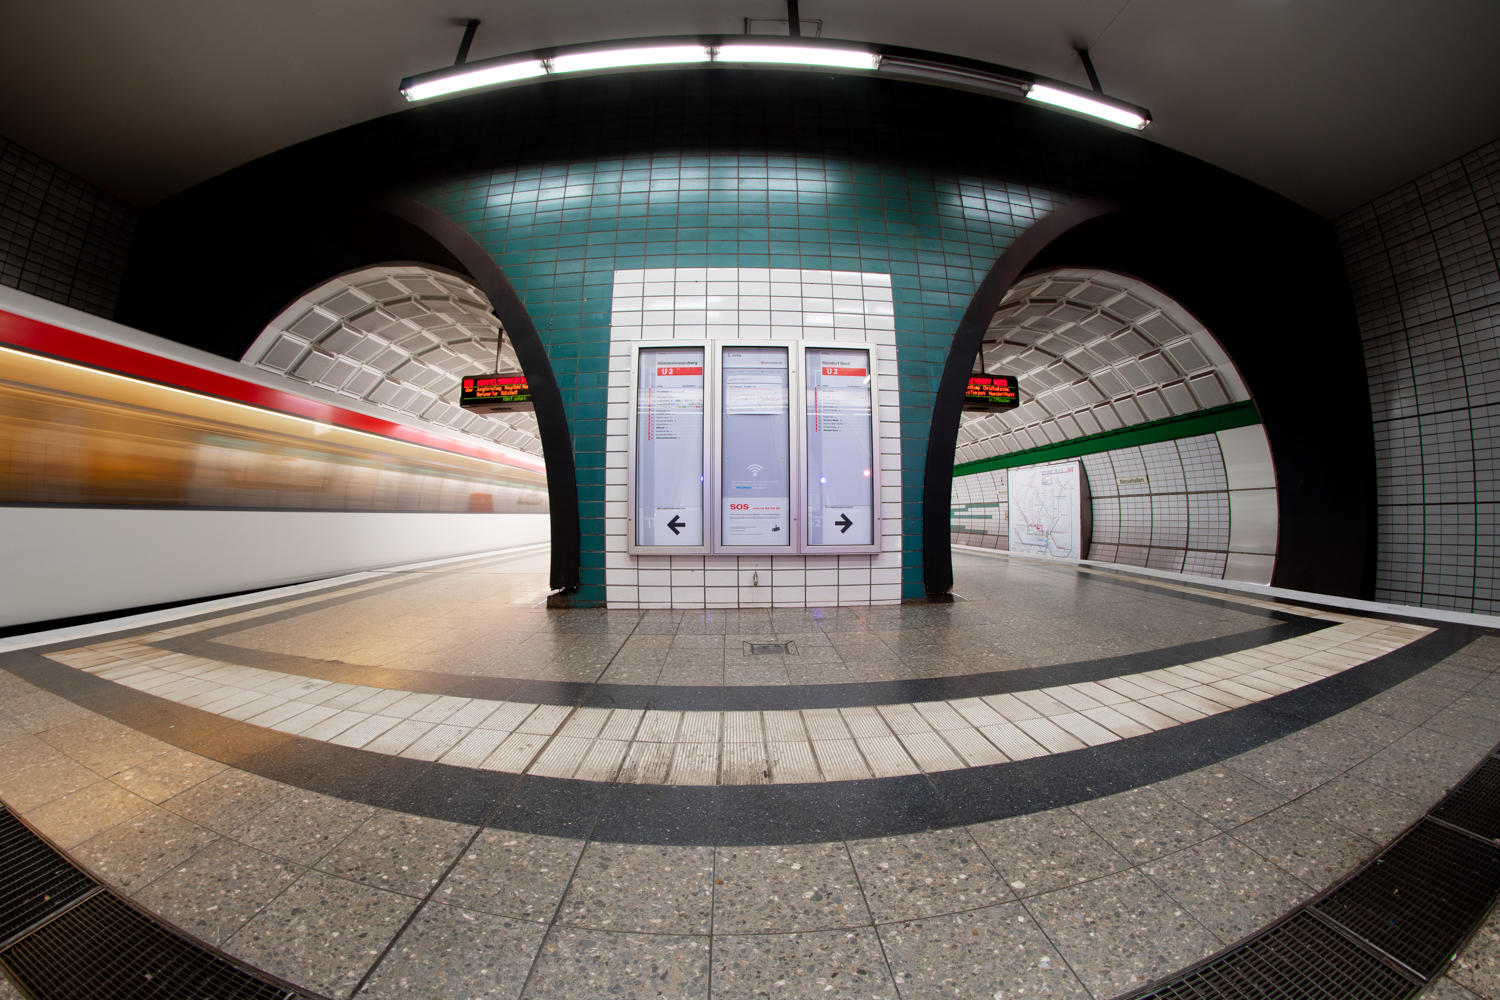
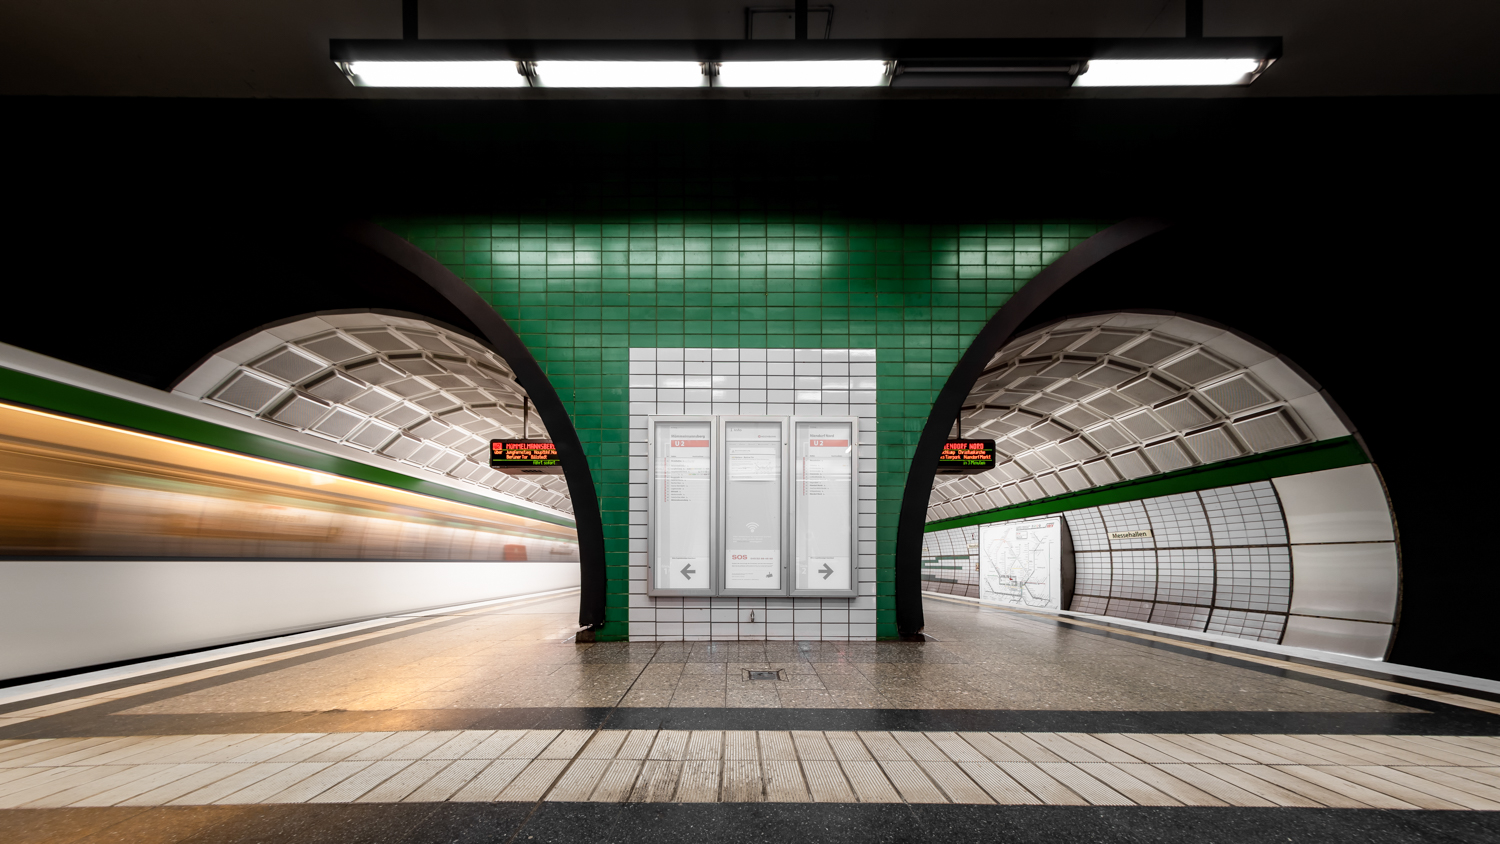
A fish(eye) in a tube
Using a fisheye lens in an already tubed location can be very effective. The bent lines of a tube such as an underground tunnel or an airplane (or any other pipe you may think of…) hides the fisheye effect and the viewer gets the feeling of a very deep and long tunnel. However, if your tube does have some objects in it that are not tubed, then the fisheye effect will work on them- creating a very interesting play.
Take a look below. These shots are from the U Bahn tube in Vienna.
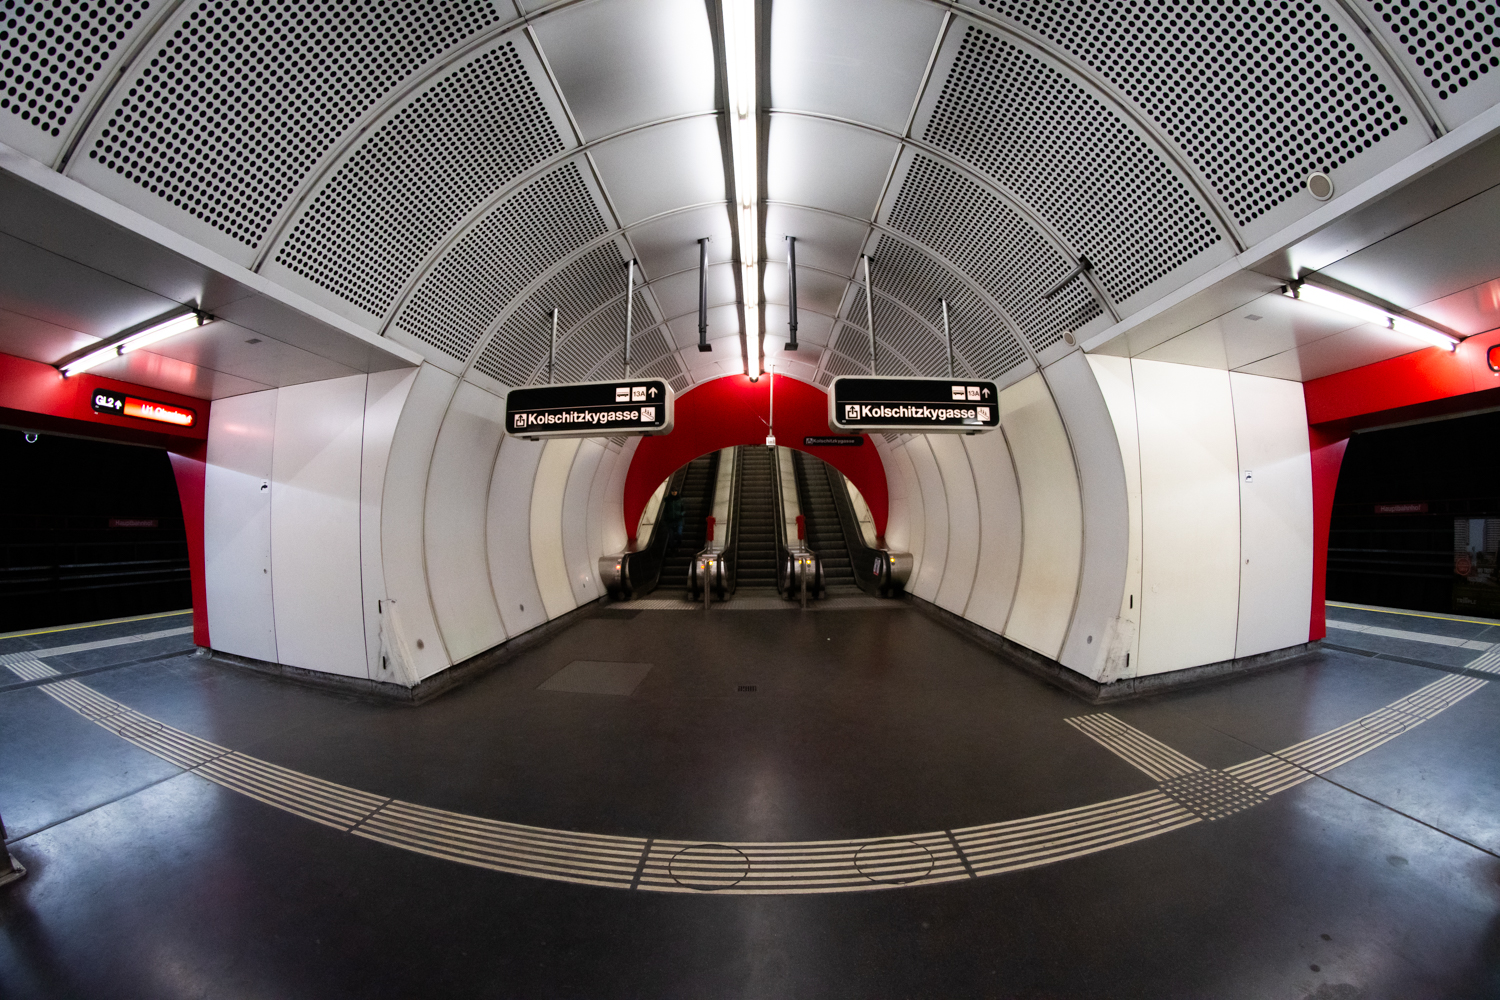
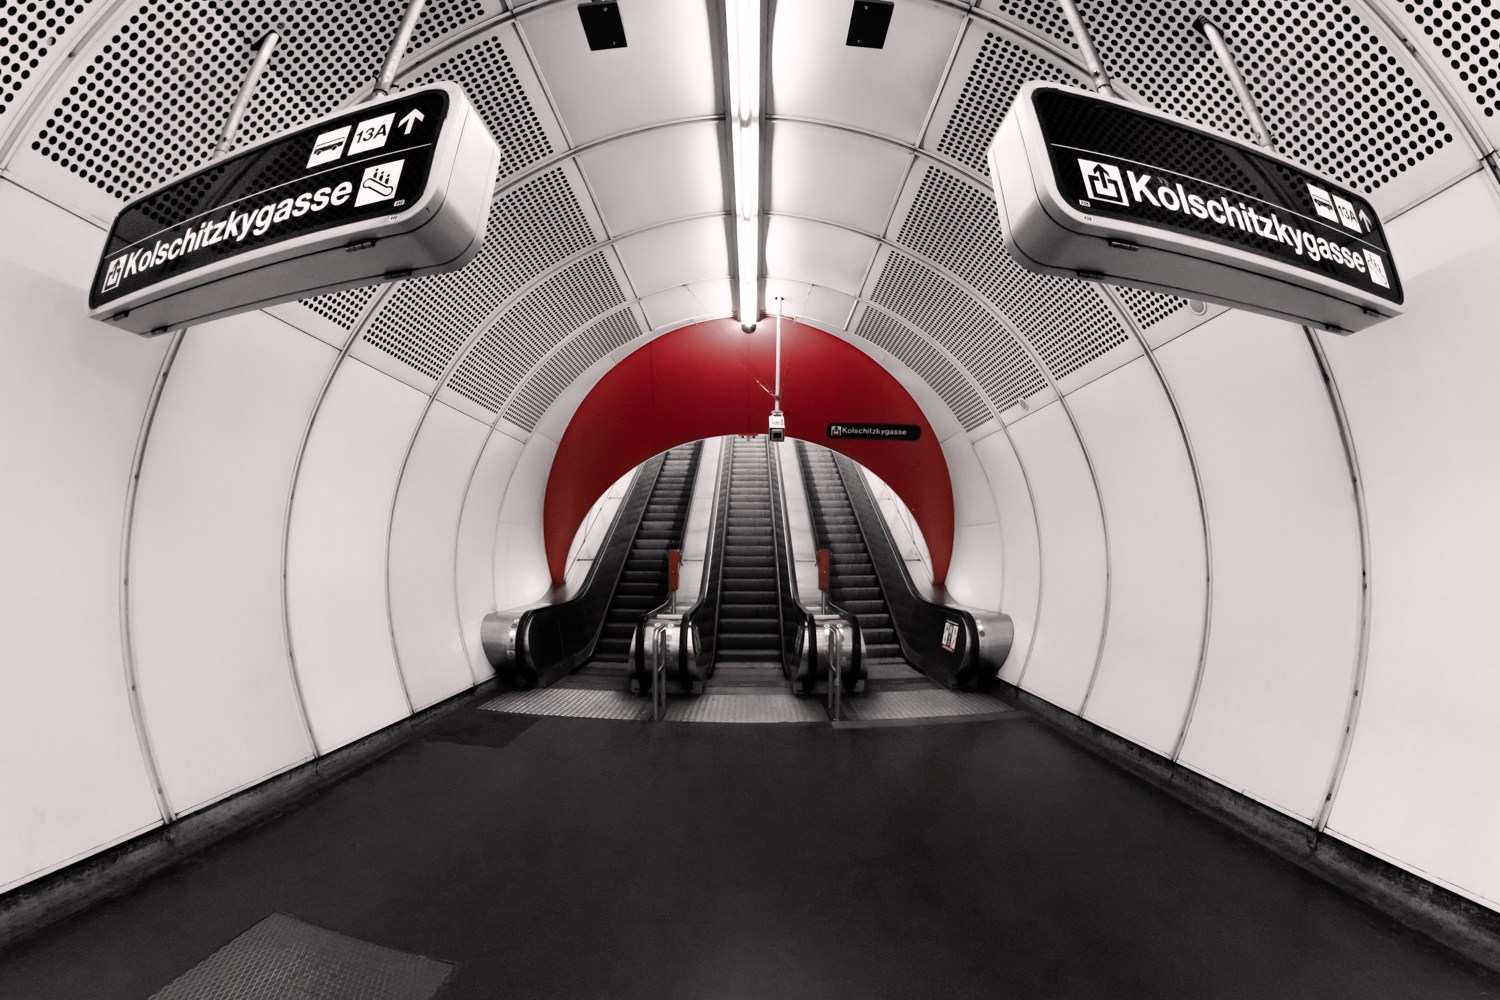
Note how in the picture on the left you can immediately notice the fisheye effect. The floor and the walls on the right and left give it away instantly. Once I took 5 steps forward I’ve taken most of the straight lines out of the frame and if it weren’t for those black signs at the top of the frame you would hardly notice the fisheye. It takes a minute or two for the viewer to understand what is happening.
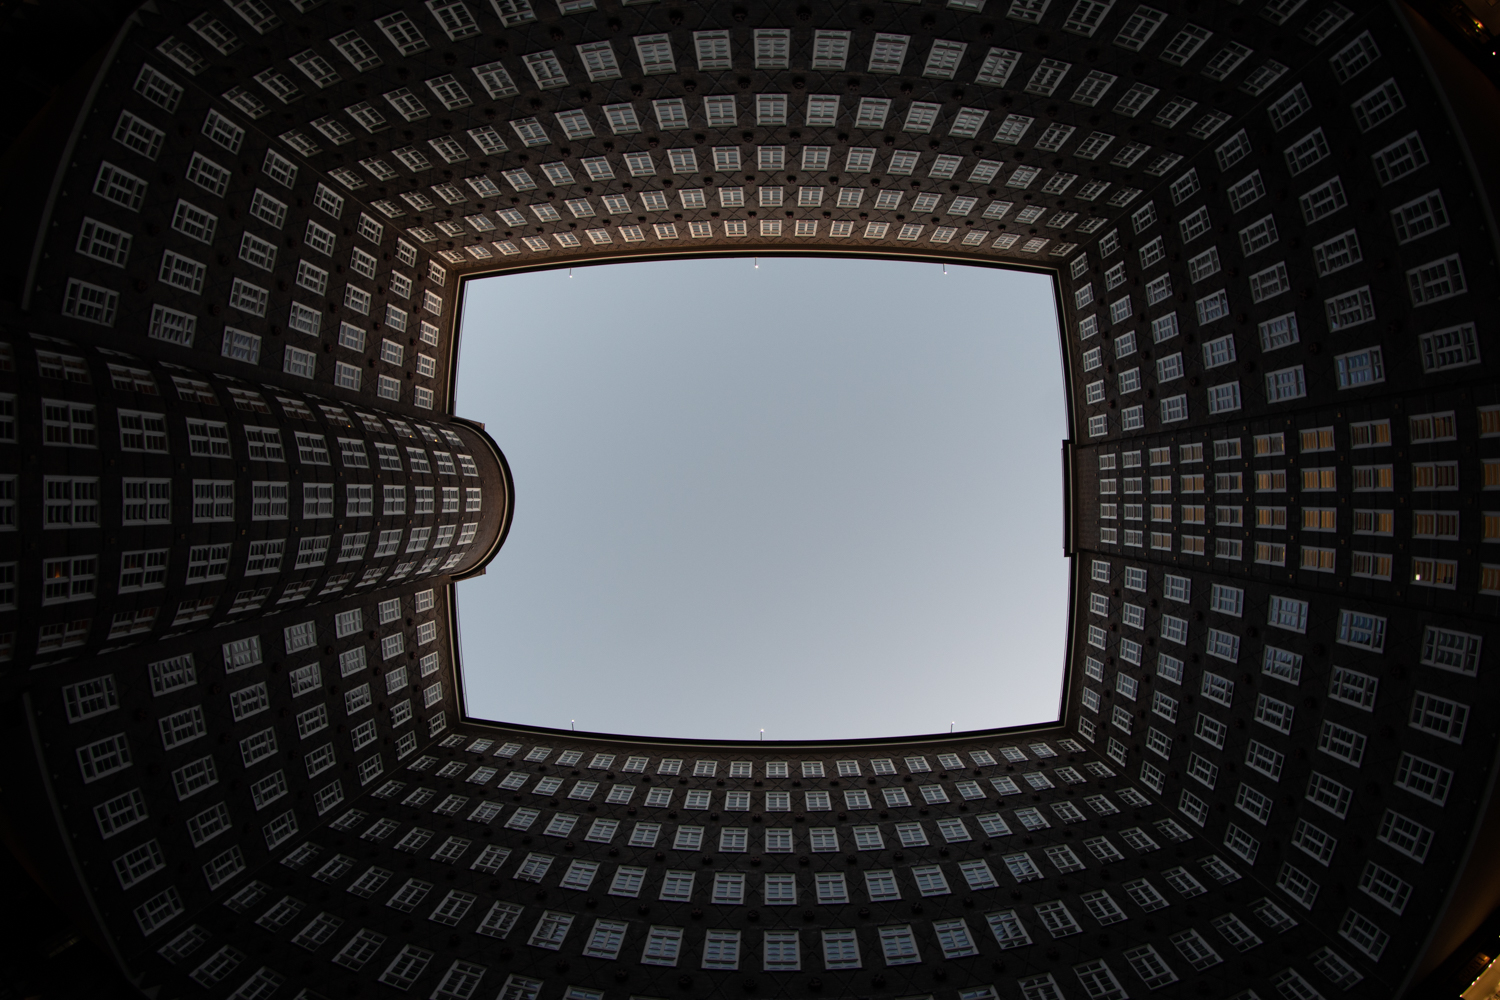
Unfish the fisheye
One of the wonderful features of the fisheye lens is its enormous angle of vision. Most of them allow 172-180 degrees of sight in one frame- that is extraordinary!
Shooting RAW and using Lightroom’s “lens profile” feature- you can very effectively eliminate the distortion and keep a very very wide angle with straight lines. Note it may “cost” you in sharpness at the edges as they will be stretched dramatically, but if you are aware of it when you compose your frame you can think of creative ways to overcome it.
Here are some examples:
Shooting this endless staircase in Munich I knew I will be cropping the edges after stretching the distortion, leaving everything that is not sharp out of the frame.
Taking this fisheye shot in the U Bahn of Hamburg I simply darkened the edges and kept only the train which is blurry anyway due to the long exposure.
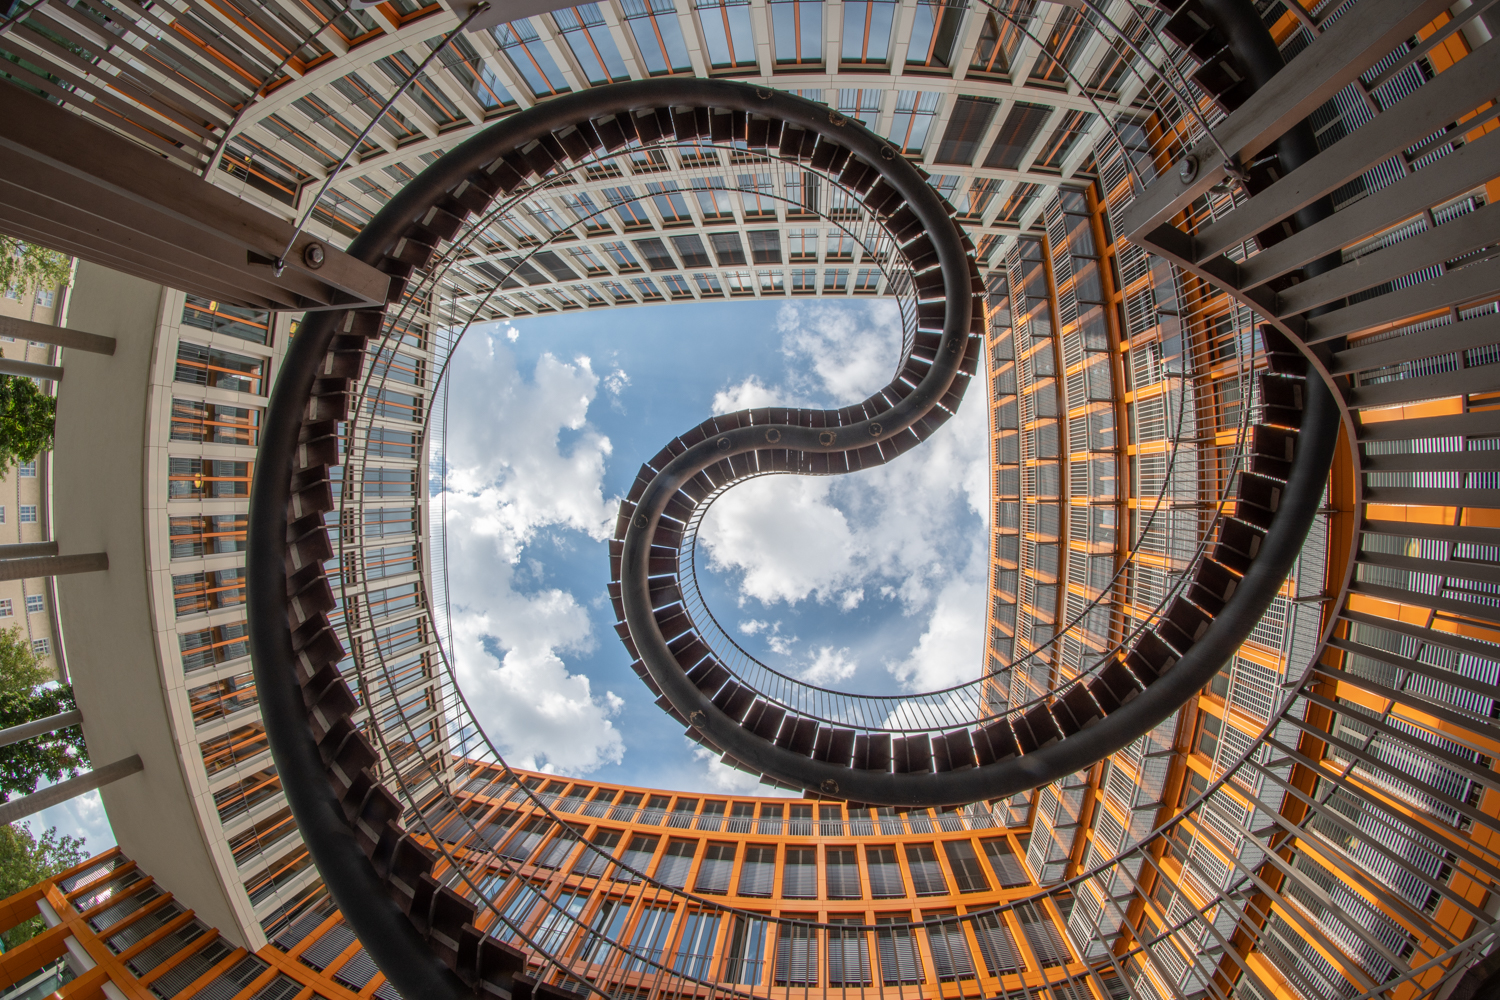
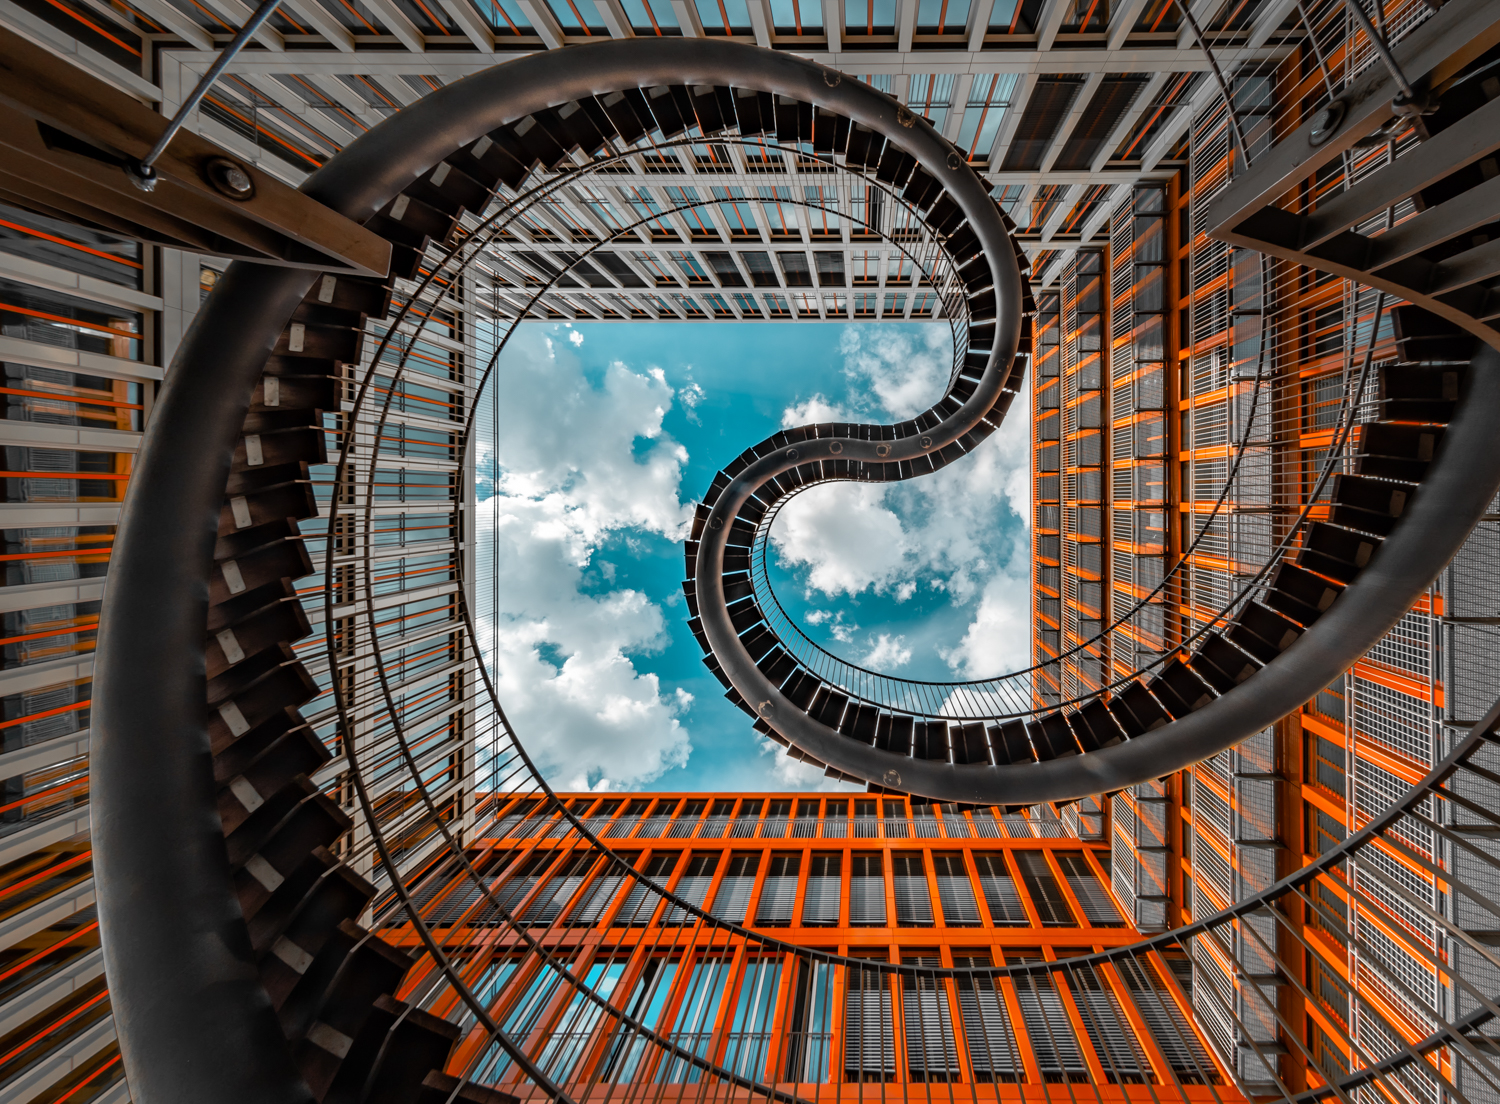
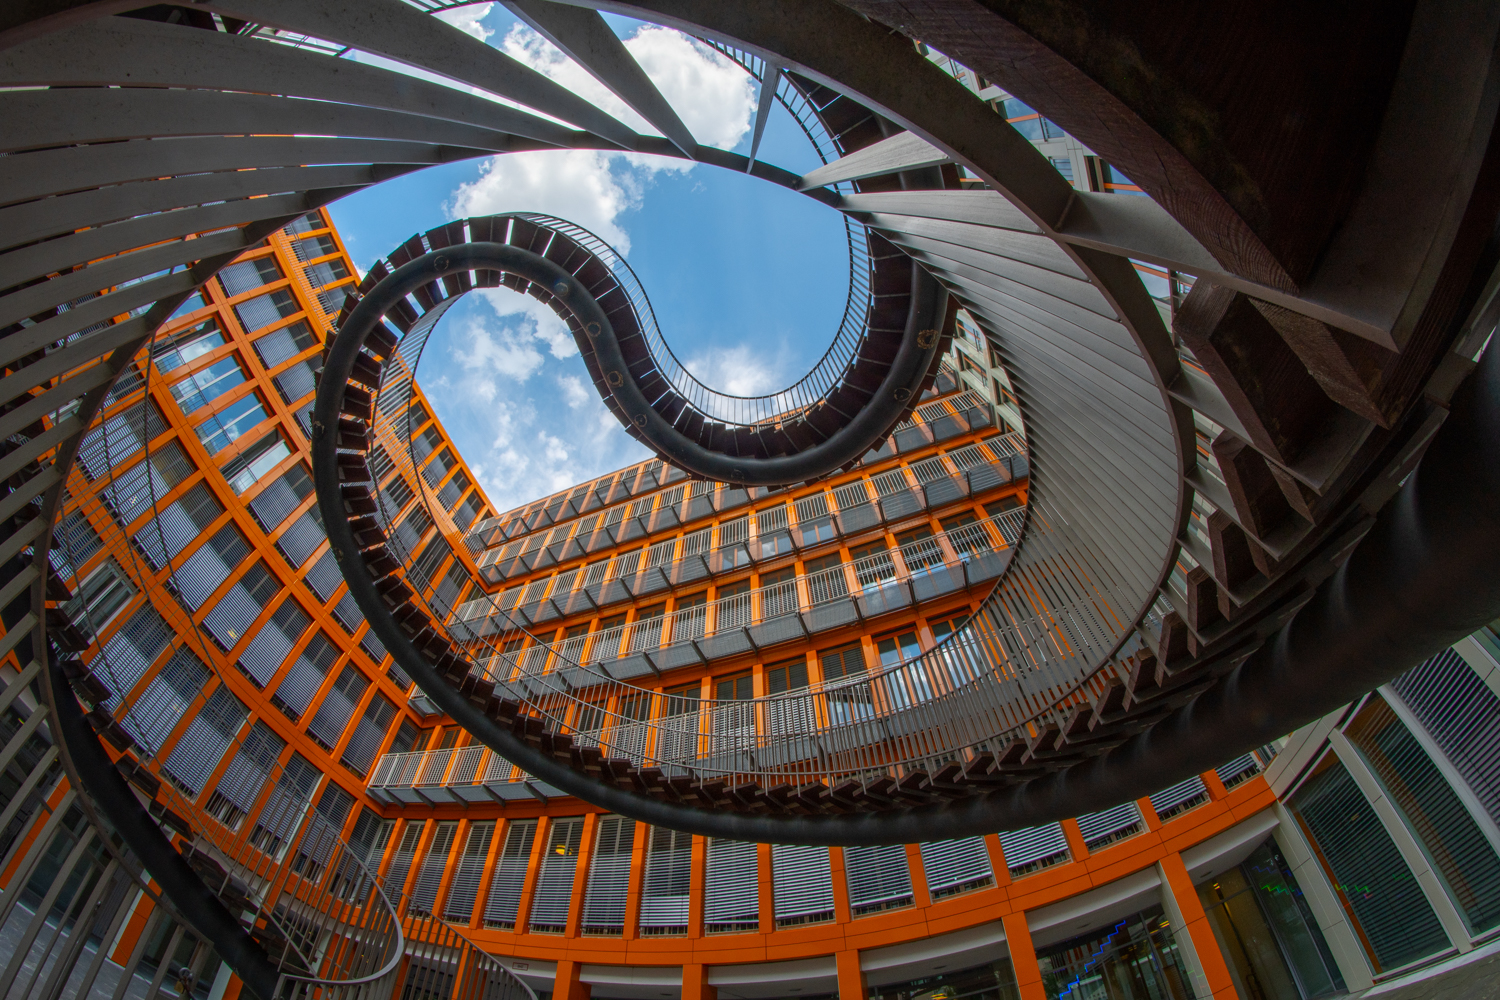
and in this work featuring the Sprinkenhof building, also in Hamburg, I simply applied a zoom effect of the edges. No wonder I called this work “Zoom” …

I hope this little guide will help you get more from your fisheye lens. The way I see it- Fisheye is an amazing tool and it is too creative to be collecting dust on your lens shelf ;)
If you have any questions or thoughts - feel free to ping me in the comments below or on my social channels. Looking forward to see more of those fisheye shots out there….!
Cheers,
Yuval